InterpretBank transcription options
InterpretBank offers several solutions for live transcription. The most important and complete solution is the installable Live Transcribe App, which you download and run on your computer. It supports both local speech models and GDPR-compliant cloud models, making it the best choice when accuracy, confidentiality, and professional setup flexibility matter. As an alternative, live transcription is also integrated in the InterpretBank WebApp, where it is suitable for quick use on mobile devices.
| Offering |
Where it runs |
Best for |
Main advantages |
| Installable Live Transcribe App |
On your computer, with a choice between the Cloud engine and the Local engine. |
Professional interpreting assignments, booth-console connections, video meetings, and situations where accuracy and compliance matter. |
Highest accuracy, GDPR-compliant options, local processing when needed, glossary suggestions, and support for inflected glossary forms in many languages. |
| Live transcription in the WebApp |
In the browser, inside the InterpretBank WebApp. |
Quick transcription on the run, especially on mobile devices or when your computer is not available. |
No installation, fast access from the WebApp, and a simple transcription workflow for mobile use. |
Live Transcribe is a virtual assistant that supports you during interpreting by transcribing speech in real time. While you interpret, it displays the spoken text, allows you to translate the transcription on the fly, highlights numbers, and gives you instant access to terminology from your glossaries.
Live Transcribe is designed for high precision in real-time speech recognition and can be used both in simultaneous interpreting (as a Digital Boothmate) and in dialogic interpreting.
One installable app, two transcription engines
In the installable Live Transcribe App, you can choose between the Cloud engine and the Local engine for each session.
With the Cloud engine the audio is sent in real time to an EU-based, GDPR-compliant, speech recognition server, while the Local engine transcribes the audio directly on your machine without any audio leaving your computer. The Cloud engine supports more languages and offers 2x level of accuracy. For many use cases, the accuracy of the local engines are sufficient. The Cloud engine requires credits that need to be acquired separately on our webpage.
Quick Start (2 min)
- Install and open Live Transcribe.
- Choose the Cloud or Local transcription engine.
- Open a glossary directly in the app if you want terminology support.
- Select the source language and the audio input that carries the speaker's audio, then start transcription.
Before you start
- Live Transcribe comes with a pre installed English (small) model. For better English transcription or for other languages you can download other models.
- You can download the models directly in menu Settings/Local models.
- Check microphone or computer audio permissions before the event starts.
- Test the audio source and session flow before going live.
Start a transcription session
Use this flow for both cloud and local transcription.
- Open
InterpretBank Transcription.
- Select Cloud or Local as the transcription engine.
- If you use the local engine, make sure the required language model is installed in Settings > Local Models.
- Select the source language and target language.
- Select the audio input, such as your microphone or Computer Audio.
- Open a glossary inside the app when you want live terminology matches on top of number highlighting.
- Click Start to begin transcription. Use Clear to reset the transcript and terminology.
Use a glossary
Glossaries are opened directly in InterpretBank Transcription. You do not need to start the session from InterpretBank Desktop.
- Open Glossary selector in InterpretBank Transcription.
- Choose the glossary and/or subglossary you want to use.
- Click Load glossary.
- Start or continue the transcription session.
The loaded glossary is used for live terminology matches and suggestions during the session.
Options
Use the controls in the top toolbar to change languages, choose your audio source, or clear the transcription.
- Swap languages: Click the arrow between the two languages to swap the source and target languages. When using the Local engine, loading the new language model may take a few seconds, depending on your computer's processing power.
- Select the audio source: Click the audio input selector, which displays the currently selected device (for example, MacBook Pro Microphone). Choose the source you want the app to transcribe. To transcribe audio playing on your computer, such as a Zoom meeting, select Computer Audio.
- Clear the transcription: Click the eraser icon near the right end of the toolbar to clear everything transcribed so far.
How to connect the audio of a physical console (on-site)
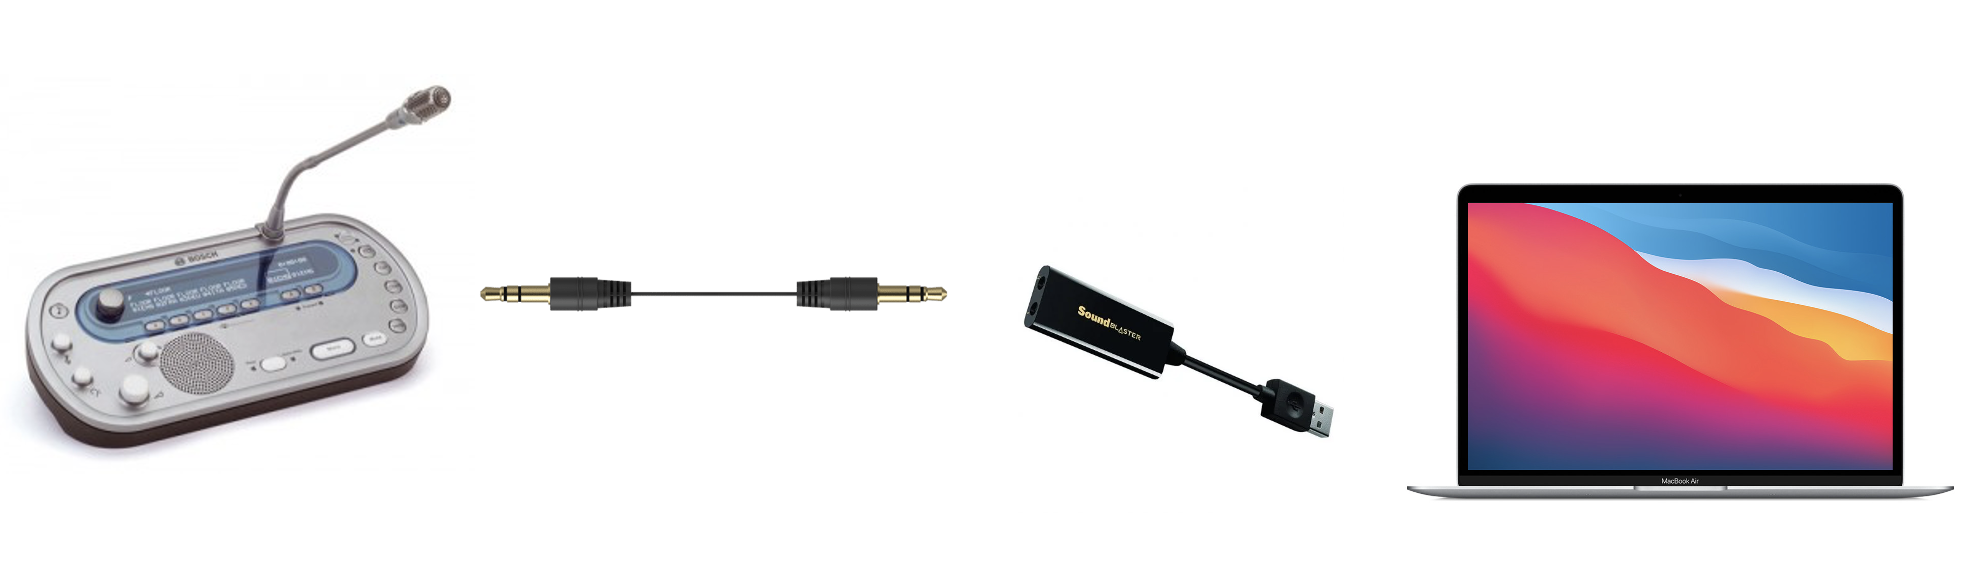
To use InterpretBank Transcription on-site, you must send the interpreter feed from the booth console to your computer. In practice, you connect the console output to an audio input that InterpretBank Transcription can read.
You will usually need:
-
Male-to-male 3.5 mm audio AUX cable
(example)
-
External USB sound card with audio input:
a simple mic-in
(example)
or a sound card with a proper line-in
(example)
Connect the line-out of the booth console to the audio-in of the external sound card using the AUX cable. Then connect the sound card to your computer via USB.
Recommendation: use a sound card with a proper line-in whenever possible. If you use a mic-in input, keep the input volume low because mic inputs are more sensitive and may distort the signal.
Once the sound card is connected, start a transcription session. In many cases, InterpretBank Transcription will detect the new input automatically and no additional configuration will be required.
When prompted by Chrome, allow access to audio input. If you need to change the source manually, open Settings > Audio in InterpretBank Transcription and select the desired input from the dropdown menu.
Troubleshooting. If no transcription appears but the audio meter is moving in Settings > Audio, the problem is often related to Chrome microphone permissions rather than the cable setup.
To reset audio permissions in Chrome:
- Open the transcription session page in Chrome.
- Click the lock icon (or settings icon) to the left of the address bar.
- Set Microphone to Ask or Allow.
- Reload the page.
- When prompted again, allow Chrome to access the audio input.
After reloading, verify that the correct audio input is selected in Settings > Audio and that the audio meter is active. Transcription should start within a few seconds.
How to transcribe the voice from any app (Zoom, YouTube, etc.)
This setup allows InterpretBank Transcription to transcribe audio already playing on your computer, such as Zoom, YouTube, or another remote platform.
- Start playing the audio on your computer.
- Open InterpretBank Transcription.
- Open Settings > Audio.
- Select Computer Audio as the input device.
- Start the transcription session.